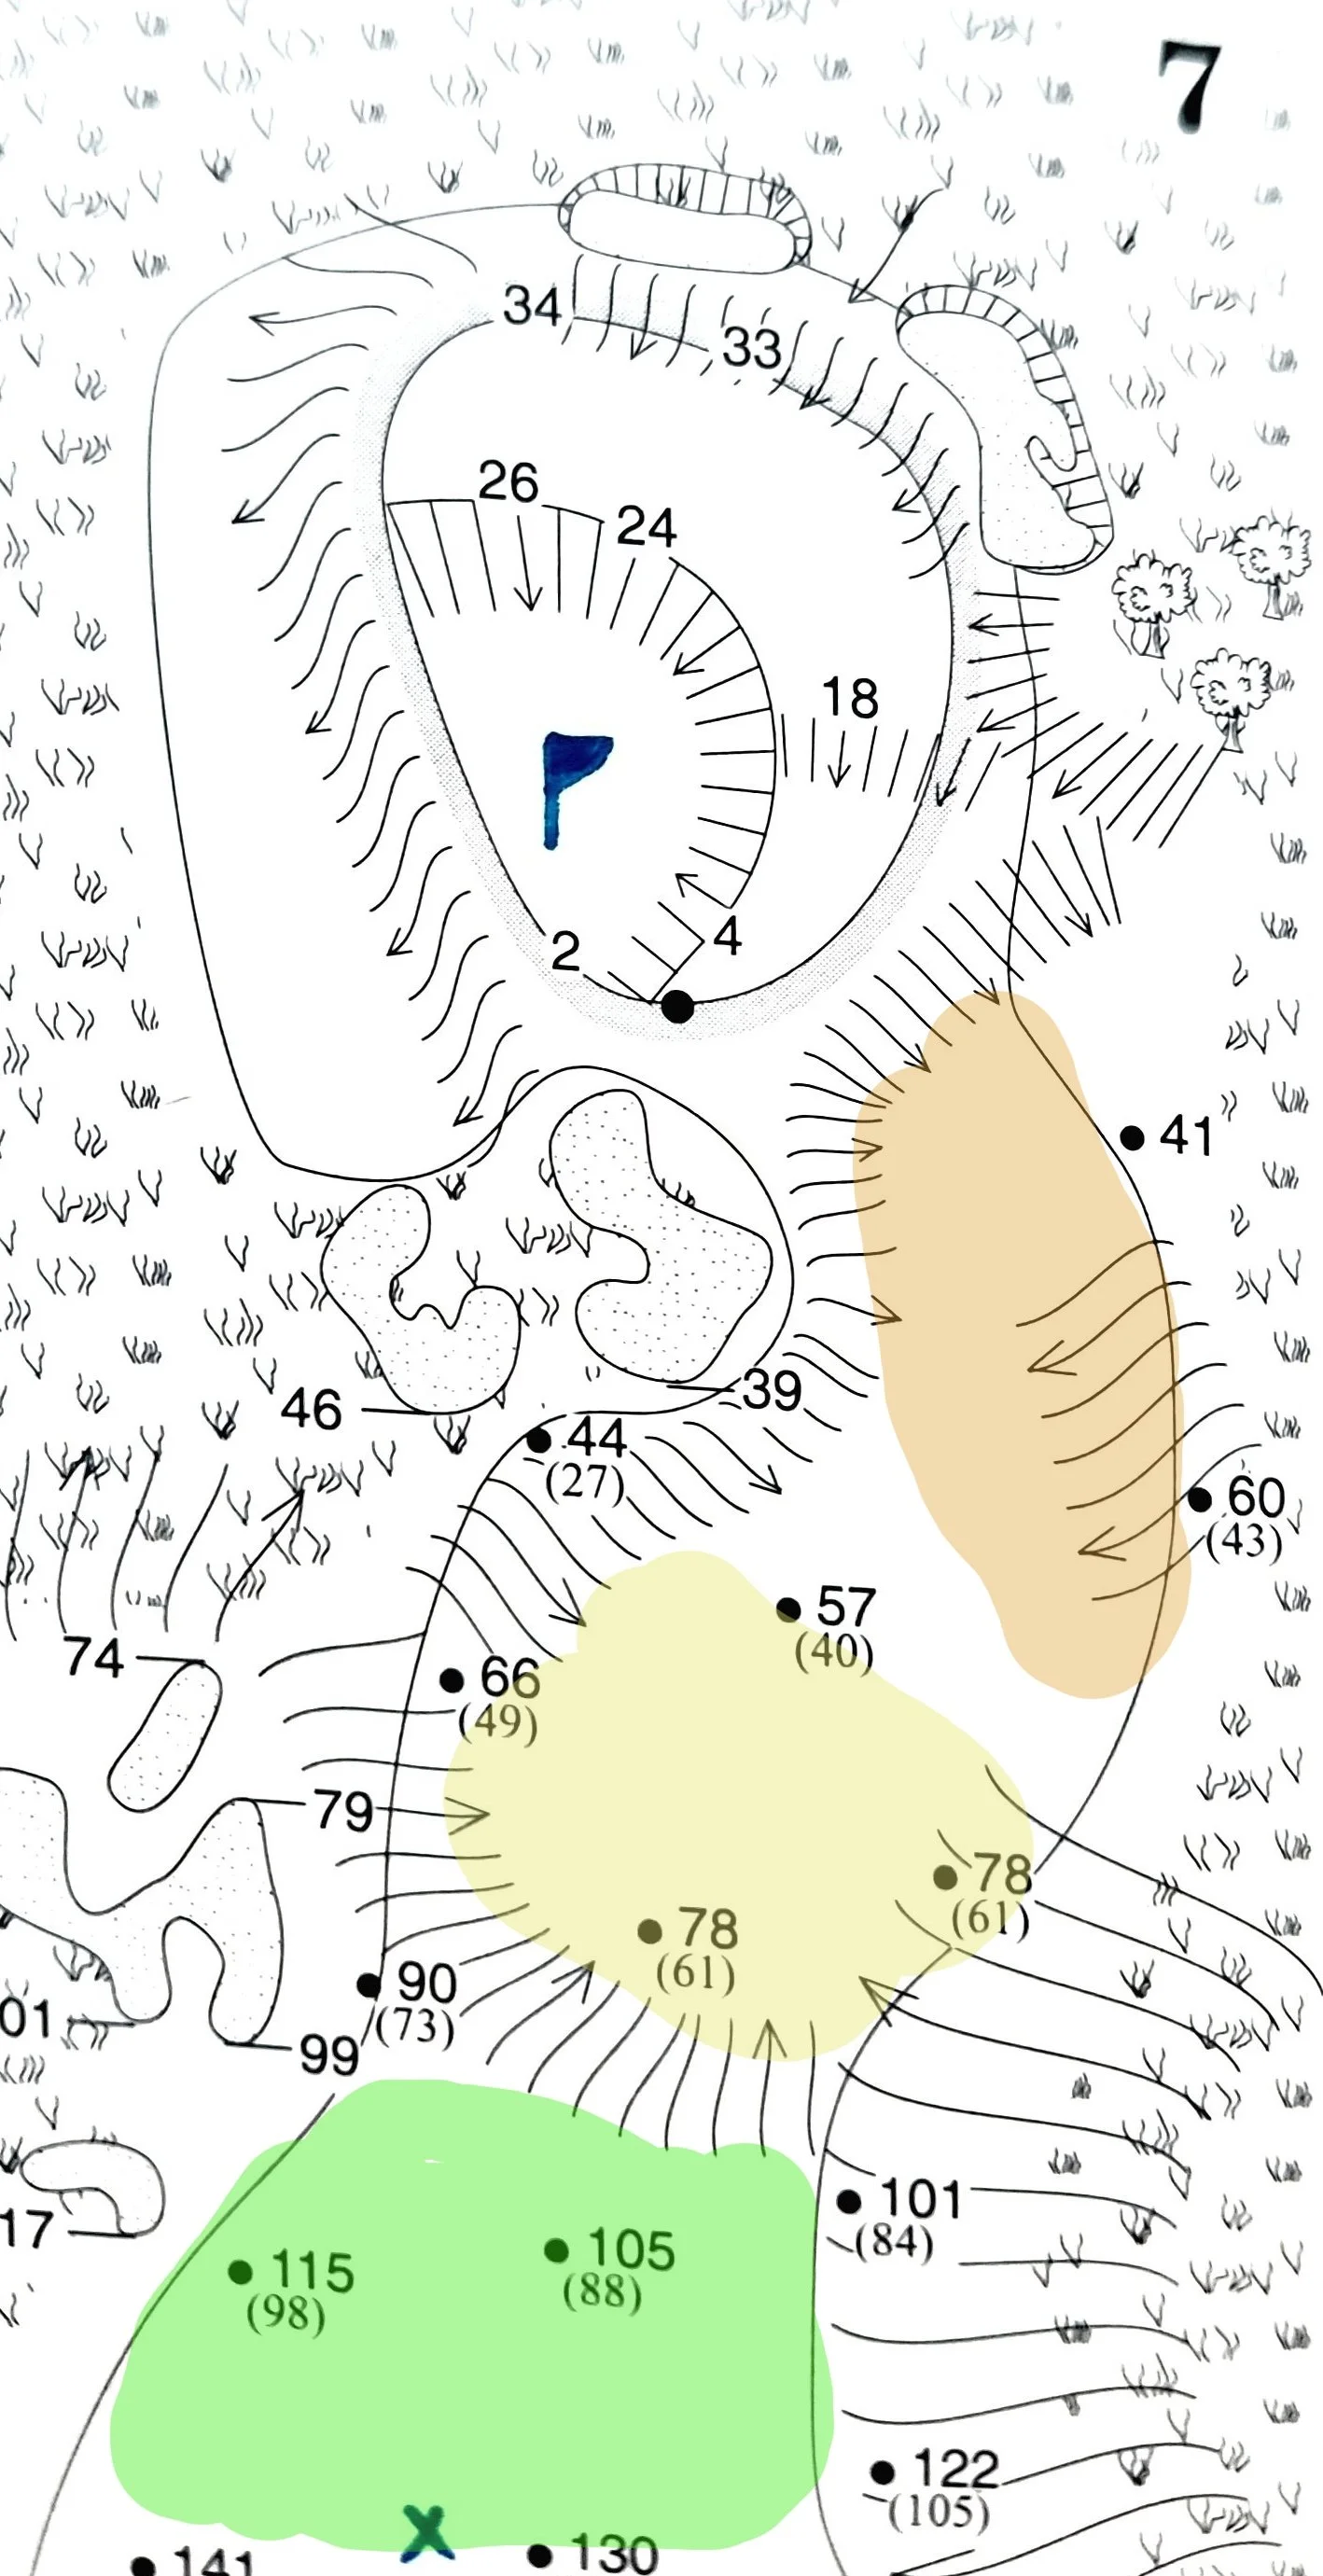
Course Breakdown: Kingsley Club #7
Kingsley #7
This challenging par 5 requires you to make an important decision right from the start. Depending on the tee box you're playing from, hitting a driver may not be the most strategic choice. You would realize this by doing your due diligence and noting that the bushes on the right are only about 240 yards away, while the trees on the left are at about 270 yards. I almost always hit my 220-yard club when playing from the blue tees, and the wind determines whether I hit driver from the gold tees (280-yard bushes / 310-yard trees).
If you're trying to stay short of the bushes and trees, there is far more room on the left than it looks like, which provides the best angle to advance the ball up the fairway. The right side might look inviting from the tee, but even a slight miss can leave you with a difficult lie on a shot that requires a blind carry over the right hillside. I typically aim at the left bunker.
The blind shot, however, offers plenty of landmarks for aiming. Please use the Google Earth image to visualize the sight lines when you're behind the hillside. If you can see the large trees to the right of the green, remember that the green is actually left of these trees, with the smaller, stand alone tree marking the right side of the green.
Here is a breakdown of where you should aim based on your location.
Right Fescue: Right of the right bush
Edge of Right Fairway: Between the bushes
Middle Fairway: Up the right fairway mow line
Edge of Left Fairway: Hug the left trees as much as possible. If blocked, hit a low runner to use the ground to move left.
This is another green where the pin position greatly influences your lay-up strategy. You can easily see the pin location from the 6th tee box or through a rangefinder from your tee shot. The green slopes from back to front and right to left, with a swale that cuts the green in half. The lower-left half has a swale that acts as a backboard, shaped like a horseshoe with the left side open. That open left side forms a false front, dropping 4 feet into rough. The back half of the green is shaped like a boomerang around the horseshoe, with a bunker long and right. Due to the design of the green, a miss to the right is much more penalizing than a miss to the left when approaching this green.
When the pin is in the front-left section, I prefer to be in the green-highlighted area of the fairway, about 110 yards from the hole. To lay up to this position, look at the nearest fairway yardage marker and subtract 120 yards. This gives you the correct distance to stay on this platform and allows for a slightly better angle from the left, which makes it easier to use the horseshoe-shaped backboard.
The yellow-highlighted area provides a worse angle and leaves you with a ¾ swing from about 70 yards. It’s not my favorite shot, but it’s still an option. You must stay a little right of the flag and can be aggressive with the backstop. The orange lay-up zone is impossible to stop on the left section of the green, so it must be avoided.
The right/back pin location changes my plan a bit because I want to eliminate the "bad" miss to the right. From the green-highlighted area, even a slight miss right could result in a poor outcome. However, if I decide to lay up closer to the green in the yellow zone, the angle improves, making the approach shot easier.
The only time I’d aim for the orange lay-up zone is when the pin is in the back-middle or back left position. In that case, I would need to hit driver off the tee to try and get past the trees on the left for a clear window into this part of the fairway. This doesn’t happen often, but if it does, it’s part of my strategy in hopes of making a birdie.
On a par 5 like this, you need to be thinking two steps ahead when determining your strategy. Failing to have a proper plan can put you at a disadvantage. As many who have played this hole know, it can turn into a blow-up hole before you even realize what happened.


