Course Breakdown: Kingsley #9
Probably the most “controversial” hole at Kingsley Club due to its feast-or-famine results. Most people hit one close and have a decent look at birdie, or they miss the green and embarrass themselves in front of the onlookers from the clubhouse deck. The hole is dramatic, but with proper course management, you’ll survive while others mumble obscenities under their breath.
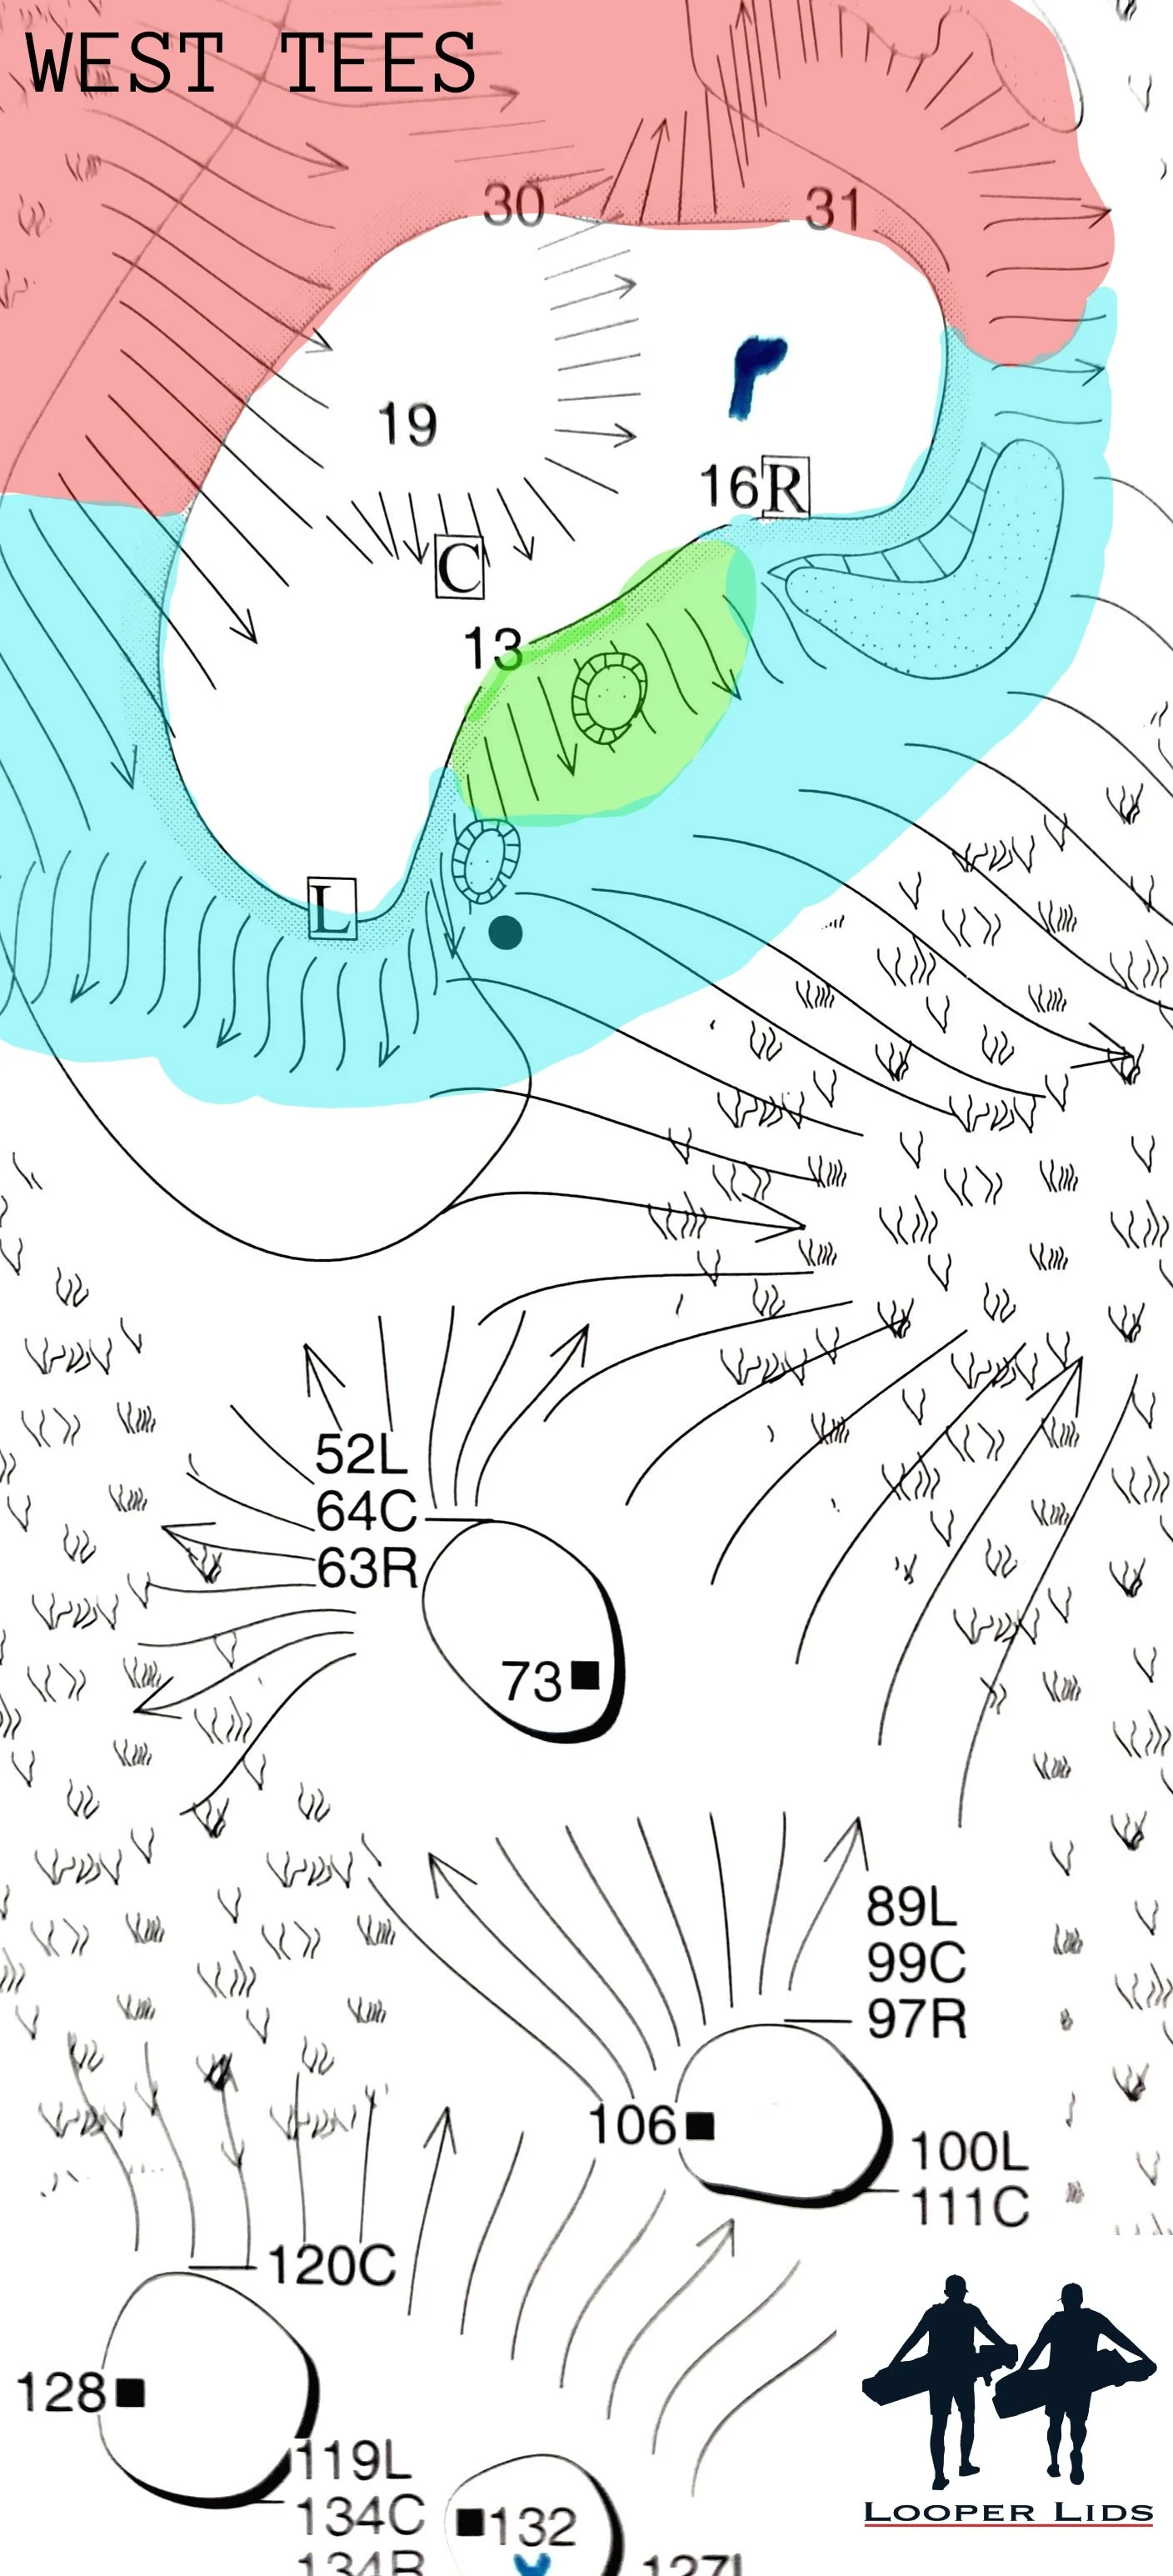
This hole is unique because there are two sets of tee boxes that are roughly 150 yards apart. One set of tees is south of the hole, and the other is west, behind the 8th green. The west tees play shorter (around 125 yards) and emphasize distance control, while the south tees play a little longer (around 150 yards) and really test your ability to hit an accurate shot.
The green boomerangs around the front-left bunkers and has three distinct landing areas. The front-left corner has a landing zone that is about 15’ x 15’ wide. With bunkers to the right of this pin location, players naturally aim left and try to use the slope as a sideboard.
However, if you miss too far left, you’ll land on a steep left-to-right slope that tends to kick balls straight across the green into the front bunkers. From the west tees, play a few yards less than the number and take direct aim. Whether you miss a little left or right, you’ll end up in the right bunkers, but this is a manageable up-and-down. From the south tees, you can get aggressive with club selection thanks to the backboard behind the hole. If you hit too far up the backboard, the ball may come screaming back toward the bunkers—but this is fine, too. Just make sure not to miss right, as this will leave you with a difficult chip shot off the green or an impossible two-putt from the middle tier.
The middle section is nicknamed "the elbow" and is arguably the smallest landing zone on the entire course. I’ve seen too many good shots just not cooperate, and we watch helplessly as the ball sneaks off the green from the tee box. I try to be sympathetic, but I’ve come to expect unfriendly results at this point. From the west tees, you need to aim directly at the pin to keep the ball on this tier, but a miss short or right still gives you a chance at par. Like the front-left pin, if you are left of the pin at all, there’s a chance you’ll get a bad kick right off the slope, and where the ball ends up is anyone’s guess. If you miss long, the green falls off by about 4 feet into some rough. From there, you’ll have to hit a flop shot that lands on a downslope and runs away into the front bunkers. I’ve seen more people quit from this spot than finish the hole with a bogey or better. From the south tees, your best miss is either short or a little left. If the flag is 160 yards, that means you only need to carry the ball 140 yards to reach the front-right portion of the green. You can’t miss long or right from this tee box to this pin location.
The right section is the largest landing zone on the green, but it requires a shot that lands softly. From the west blue tees, the yardage is around 130 yards. The front bunker is 125 yards to carry, and the back edge is around 140. If you land the ball between these yardages, you’re good to go! If you’re between clubs, choose the shorter one because missing long to this section is a near auto bogey or worse. The long-right area is a definite no-no and must be avoided at all costs. From the south tees, the worst miss is still to the right. A little left is okay, and a touch long is a backstop. Be aggressive and aim at a spot that eliminates the right.
A tough par 3 can make or break your round. With this knowledge going into the hole, let's make sure we are doing everything we can to avoid the bad misses and live with a bogey if we aren’t able to execute.


