Course Breakdown: Kingsley #4
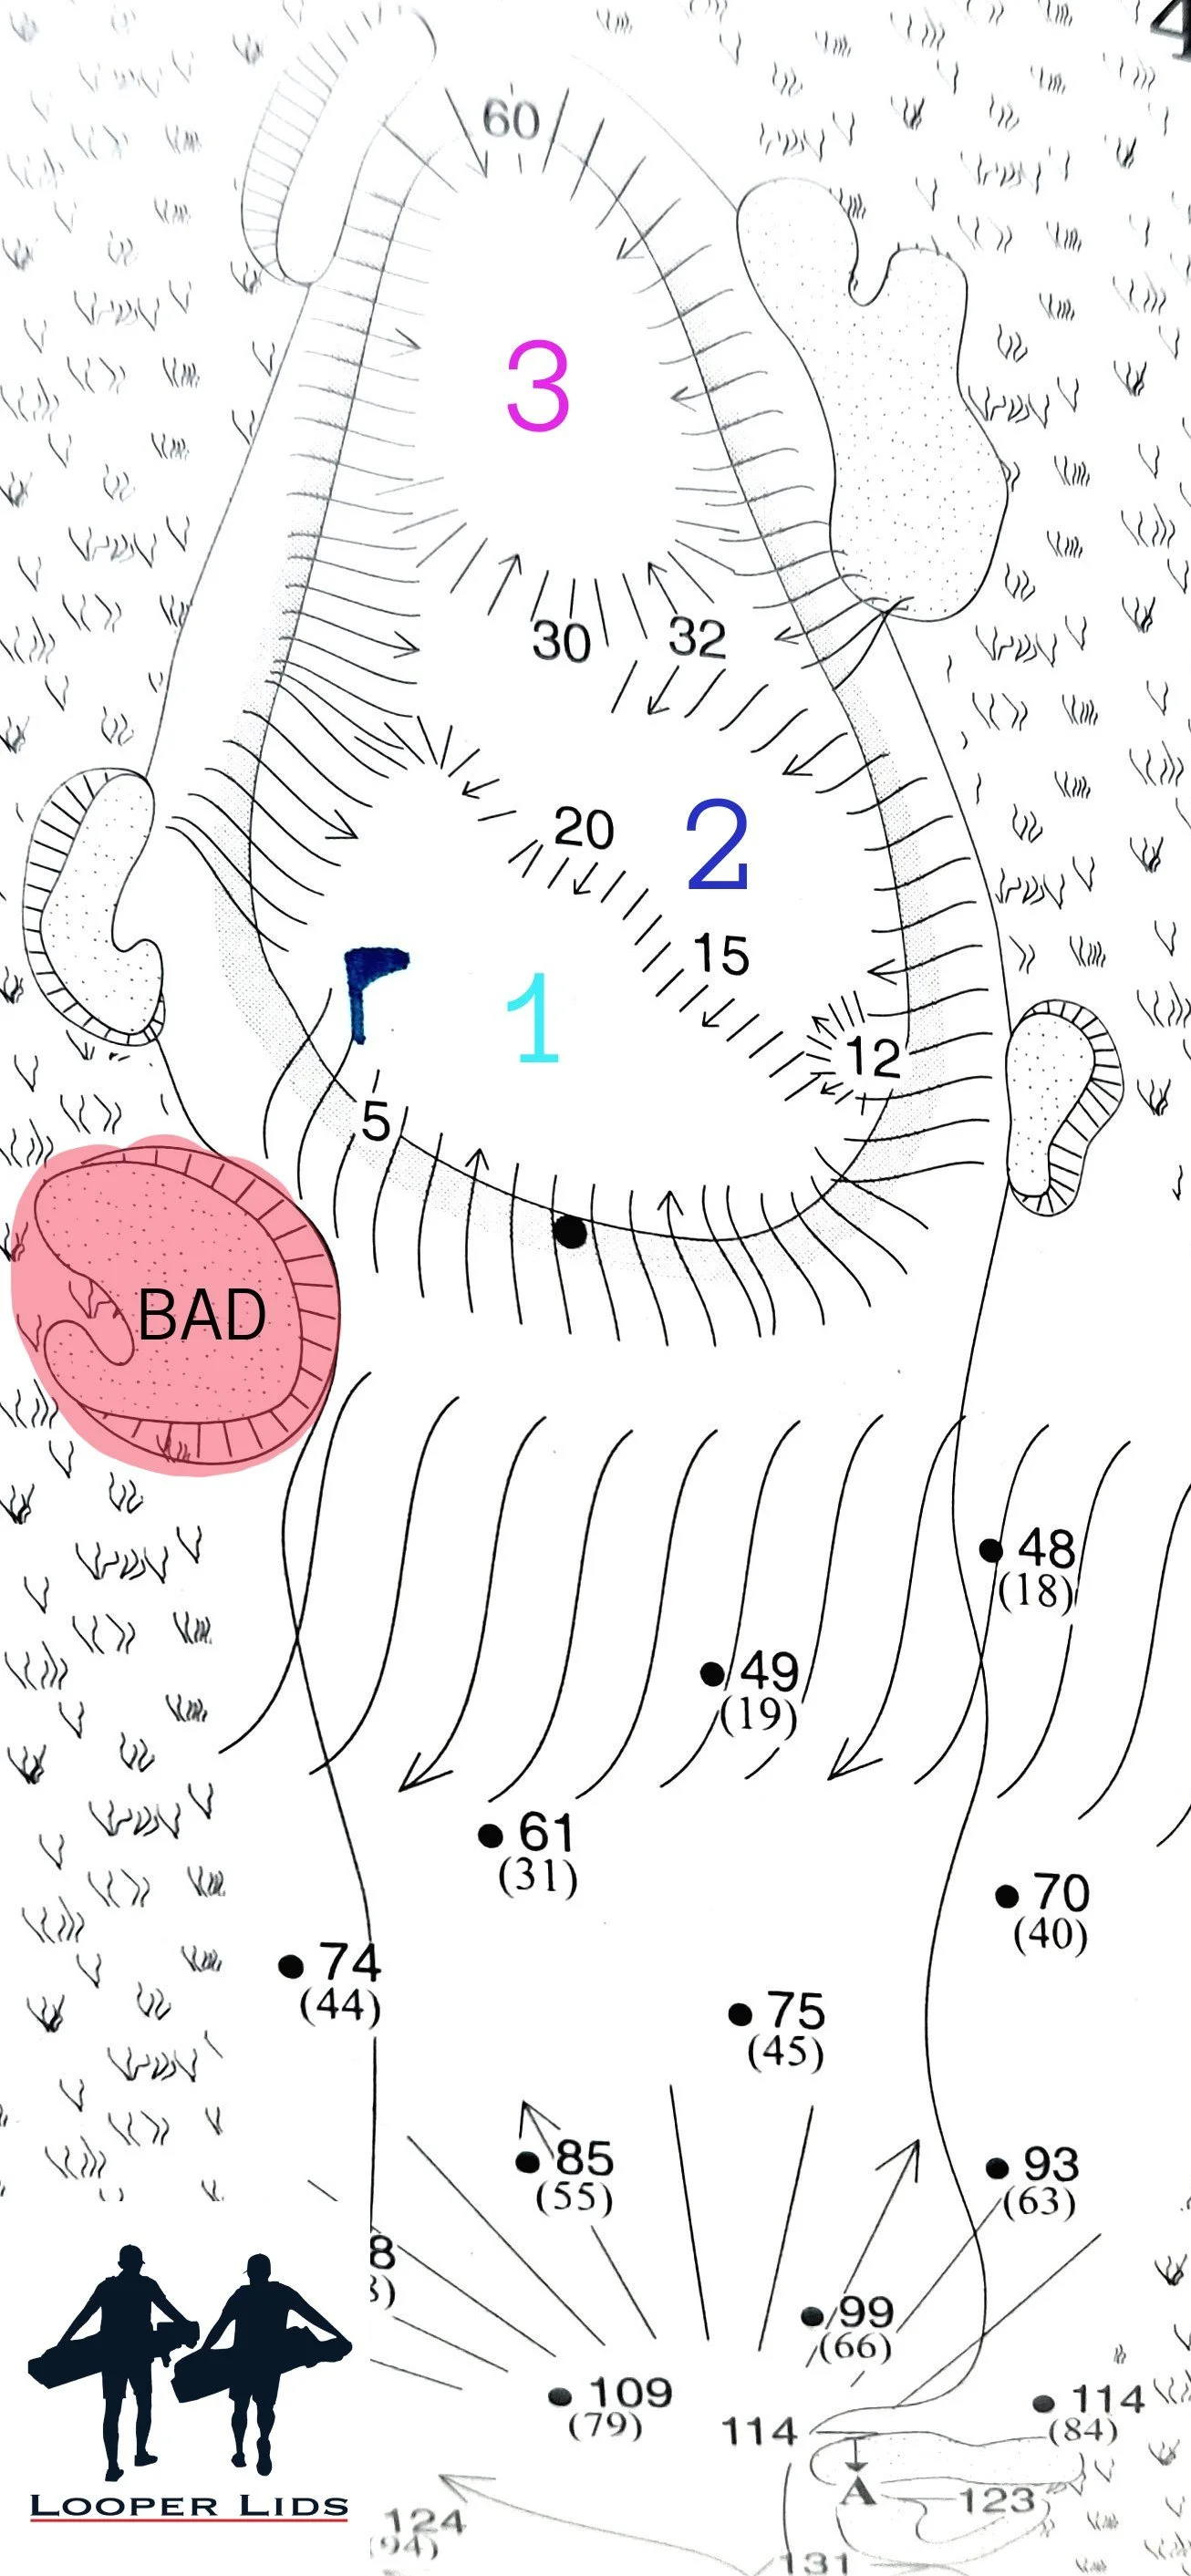
The 4th at Kingsley is rated as the 18th handicapped hole and I’m not sure I’ve ever agreed with that. The fairway on this hole is the hardest to hit on the entire golf course. The table-top fairway falls off on both the left and right side of the fairway into native grass. The right side flows into bunkers that start at 250 yards, with more fairway behind them requiring a 280 yard carry. These bunkers are deep and require a shot that gets airborne in a hurry just to avoid hitting the bunker face. I am incredibly impressed when a golfer is able to hit the green from these bunkers and that is saying a lot. The left side slopes down to rough yet your ball doesn’t typically stop until it nestles into tall grass. The left side leaves you with a shot over the short left greenside bunker to the largest green on the course (60 yards deep). This is a hole where many golfers hit their driver and simply hope for the best but I’m here to argue that isn’t the best strategy.
My club selection on this hole depends on where the pin is located. I either hit driver, aiming up the left side to take the right bunkers out of play, or a 5-wood to stay short of the right bunkers. There are three distinct areas on the green: the front section, the middle-right section, and the back bowl. Without disclosing my strategy, look at the green and guess where I hit the driver and why.
If you guessed the middle-right section, you are correct! The left angle to that right section is worth the risk of being in the native grass. From the left side, you have plenty of room to take the front bunker out of play, and you can use the backboard if you end up a little long.
The front and back pin locations are most easily accessible from the right side(marked safe). Since I can’t carry the bunkers, I stay short of them. It is a blind shot, but there are plenty of trees to use as a sight line, even though you can’t see the pin. Find a place where you can see the flag and pick your targeted tree.
As mentioned, this green is huge and has a pronounced bowl shape. There is a ridge that divides the green in half. The front half slopes steeply from the middle ridge down toward the front of the green. Beyond the middle ridge, the green slopes dramatically toward the back.
When choosing a club for your approach shot, there are a few intricacies to keep in mind. The front of the green slopes from front to back, meaning if the pin is in the front, you need to make sure to land the ball beyond that front slope. Otherwise, the downhill and firm greens will catapult the ball forward.
The back bowl is a very fun pin location, but if you don’t quite reach the middle ridge, you’ll have a tough putt left. I encourage my golfers to be aggressive when playing to this pin because there is room to miss left, right, or long, and the slope of the green will trickle the ball back toward the hole. If you happen to hit a wild shot, use the embankment on the opposite side of the green as a backboard. Just make sure to call “bank”!
-Your hat caddies


